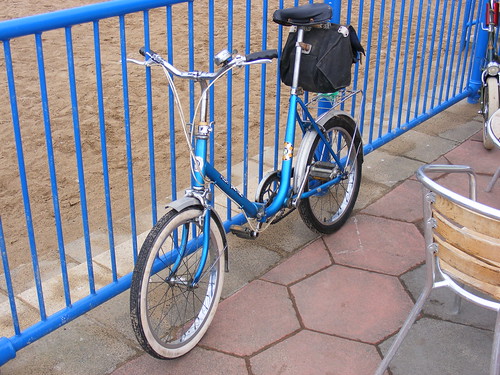
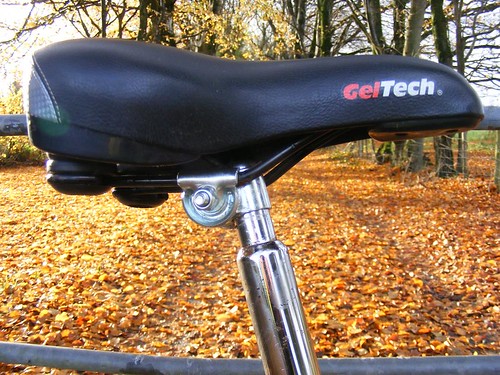
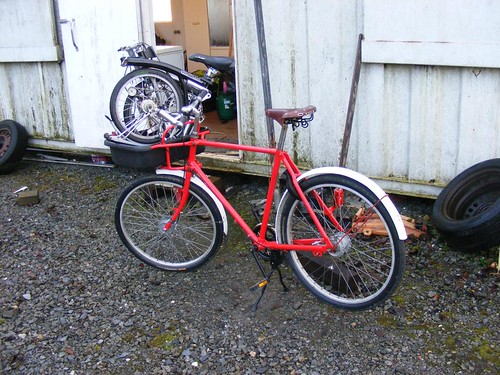
I bought my 2006 Brompton second-hand in 2016. It came with new tyres fitted and I gave it a service at the time but didn’t do much else beyond make a few tweaks such as fitting the sprung leather saddle which gave me just enough extra extension in the seatpost for efficient pedalling without the expense of buying the extended seatpost. It is also much more comfortable in my opinion; I favour leather saddles and sprung saddles may have gone out of fashion over the years but can add a lot of comfort on any bike with an upright riding position.

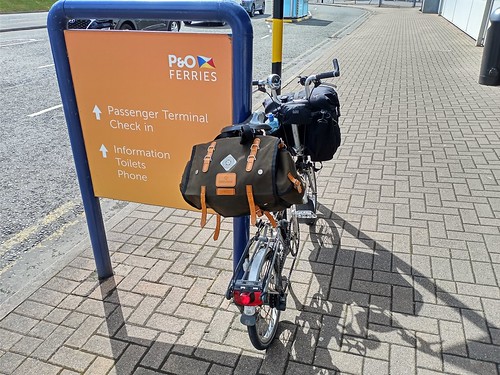
After eight years of use, and many thousands of miles, now on my fourth rear tyre and second front tyre, I could no longer ignore the need to give the bike some tender loving care. When I bought it, I did so because I always liked the design and I thought it would be useful to have to carry in the car. I never really expected to use it as much as I have. I have been as far afield as Loch Lomond, muscled it up hills it in the sort of terrain where most people would say a triple chainset would be required and often carried heavy loads – luggage when touring or shopping, etc when used locally as a utility bike. I’ve also used it on many occasions for a bit of gentle off-roading through forests or along riverside paths.

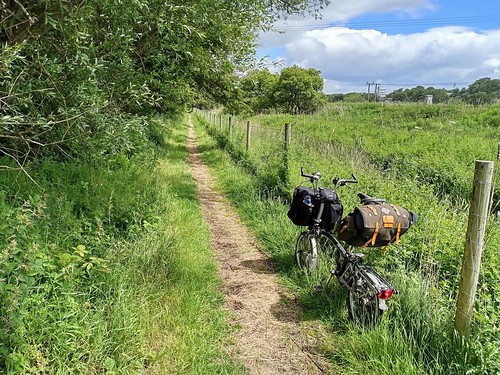
I often wonder did Brompton ever design their bike to take the use that some people have put them to. The reality is that they make excellent touring bikes if you don’t mind walking the odd hill here or there. They carry luggage so well and can be folded up to be easily transported by bus/train/car/boat/plane. They also make excellent utility bikes as when equipped with large front T-bag, they can carry a lot of messages and because the load is carried low down, it doesn’t affect the way the bike handles. Indeed, my personal opinion is that a Brompton is nicer to ride with a bit of weight on the front.

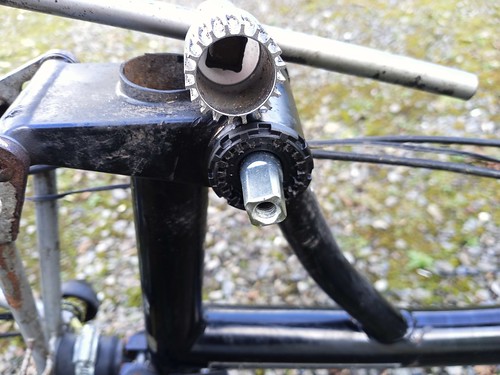
I could no longer ignore the wear that was apparent in some of the components in my bike. I had changed the headset last year as it was worn out and was affecting the steering. I was also aware of the wear in the chain and drivetrain. The thing with hub gearing or singlespeed bikes is that you can keep riding with a worn chain long past the point where a derailleur geared bike would most probably slip. I could pull the chain about half an inch away from the chainset, a sure sign of wear. The chain was also very noisy by now. The bottom bracket was also showing signs of protest with a roughness apparent. During my Scottish tour in June. It also developed a pronounced click with each revolution. I originally thought it was a pedal doing this as drivetrain noises on a bike can be difficult to pinpoint but then came to the conclusion it was the bottom bracket itself.
The point was rammed home to me somewhere on the Isle of Arran in June where I met several other Brompton tourists and I did ride for a few miles alongside someone else who had a nice, shiny new titanium Brompton. The silence was remarkable compared to the cacophony of noises that came from mine. I think it was one of those things that because wear is a gradual thing, I was used riding it and didn’t notice too much. Hub geared bikes can be ridden like this without too many issues. I think the reason the chain was so noisy was down to the chain tensioner on the Brompton and the chain wrapping around it. On a roadster, this doesn’t happen and I’ve seen vintage roadsters work happily with unbelievably worn chains.
It was time to go on a shopping spree! I stripped the bike down earlier this month to check what I needed. In particular, I really needed to measure the bottom bracket width to ensure I was ordering the correct one. It was 119mm and on one my age, it is the less common ISO taper. With the bottom bracket cartridge removed, it allowed me confirm my diagnosis. There was no mistaking the noisy bearings and the tight spot which produced my click on each revolution. Cartridge bottom brackets are usually just made with standard sealed bearings and I did try to remove mine, as it would enable me to buy two new bearings from an engineering supplier and save the cost and the waste of replacing everything but they were contained in a plastic housing and I couldn’t find any way of working on it as any of my attempts to hold it or try to tap the bearings of the spindle was starting to crack the plastic.

So, my shopping list was one bottom bracket, a chain, a new sprocket and new jockey wheels for the tensioner. I am undecided about whether or not the jockey wheels are the same as those on a derailleur. I believe they are, but I ordered the Brompton ones anyway as they’re not expensive. My chainset was fit for further service. For touring, some people have modified their Bromptons to take double chainwheels or sometimes fit the optional 44 tooth wheel. Sometimes I have felt like having a play with fitting a double chainset and increasing the gear range but in reality, the standard 50 tooth ring works for me. I think fitting a 44 tooth ring would leave the overall gearing just too low. The double chainset setup would give a much better range but add complexity. The lovely thing about a hub geared bike is the simplicity; let’s keep it like that!
It was all pretty straight forward putting it back together and I took the opportunity to clean things as I worked through it. I probably should have taken the opportunity to strip and paint the rear triangle when I had it partially stripped anyway but I decided not to. There is no sign of breaking out into rust and this is a functional, well used bike ridden in all weathers and all road conditions. It would never remain shiny for very long.
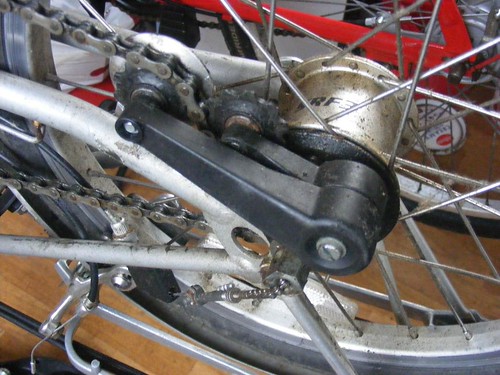
Replacing the jockey wheels on the chain tensioner was straightforward, the only tool required being a flat head screwdriver. You need to pay attention to the positioning of all the washers to preserve the chainline. I always apply a little grease to the plain bearings of jockey wheels. This is possibly one of those things where some might argue that doing so would attract dust but I still think these things are better lubricated. They spin much more freely.

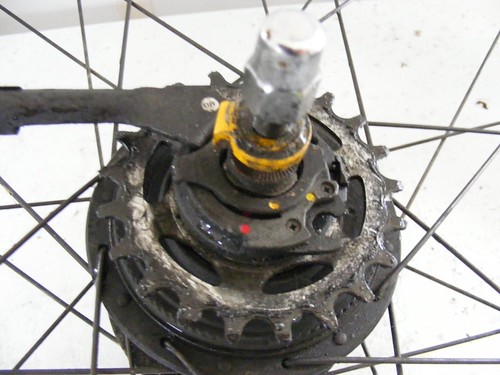
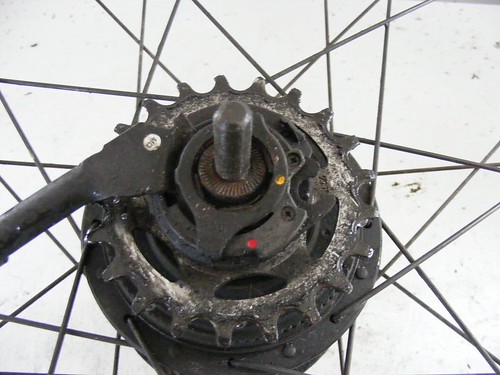
There was definite evidence of wear on the hub sprocket. I had a replacement but decided not to use it at this time as I just reversed the original to now wear the opposite side of the teeth. This is possible when the sprocket isn’t dished as it won’t interfere with the chainline.
I cleaned and greased the bottom bracket threads (standard 24 TPI British Cycle threading) before installing the new bottom bracket. It is always worth taking care with bottom bracket threads to ensure they are clean and lubricated. A 24 TPI thread is quite fine and it is easy to cross-thread it and cause damage. Never force a bottom bracket retaining ring or cup into a frame. It should screw relatively easily. If force is required, unscrew it and try again as something is wrong. Also always remember on bike with standard British cycle threading, the drive side cup will have a left-hand thread and tightens anti-clockwise. I also apply grease to the square tapers of a bottom bracket when installing the cranks. I know this is controversial but I’ve always done it and it seems to work for me.

Like most single-speed and hubgear equipped bikes, my Brompton uses the traditional wider 1/8 inch chain. Derailleur geared bikes with more than four rear sprockets use a narrower 3/32” chain. A 1/8” chain is stronger, longer lasting and probably cheaper to buy. Basically all modern cycle chains are of bushingless construction. They are lighter and allow more side flex which has enabled the increase in sprockets on modern derailleur systems. KMC still offer a traditional bushed chain which are supposed to last longer. I ordered one of these as I ride this bike a lot.


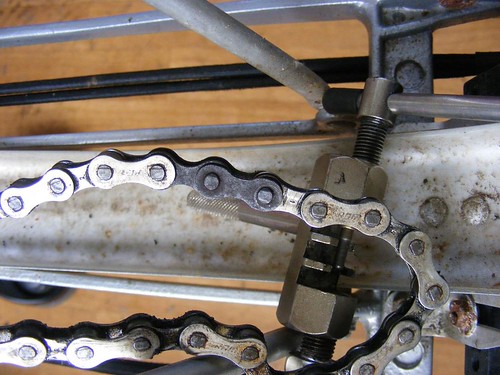
The wear in the original chain was very obvious when I examined the rivets of the joining link with a definite wear ridge apparent. There would be similar wear on the bushes of the chain as well. This shows how a chain appears to “stretch” in use with the wear in the rivet and the bush combining to make each link seem longer. Bicycles us a half inch pitch chain so each link is one link long. You can measure the wear of the chain by measuring its length with a 12” engineer’s rule which should show 12 links as being 12 inches long. Mine was measuring something like 12 3/8” so way past the point where it should have been replaced. I counted the links of the old chain to make sure I was shortening the new one to the correct length before installing.

With the chain installed and the tensioner and wheel in place, the bike was now good to go, the only remaining thing to do was to adjust the gear indicator rod, something that needs to be done on a Sturmey hub every time the wheel has been removed. When installing the indicator rod, tighten it and the release it half a turn or so. It should not be screwed in completely tight. Then put it in 2nd gear and adjust it so the flat part of the indicator rod is level with the end of the axle when viewed through the window in the wheel nut. This assumes you have the correct indicator rod which may not always be the case on older bikes. If not, just put it into 1st gear and adjust so the cable is tight and then back it off to allow a tiny amount of movement. I can explain this in more detail if anyone wants to know.


A quick test ride showed how much better the bike rides, no mechanical noise and everything silky smooth. It was all very worthwhile and my Brompton is almost as good as new again from a mechanical point of view for a tiny fraction of the cost of actually buying a new one and shows how cheap running and maintaining a bike is compared to running a car!
I haven’t done very much cycling at all these past two months due to a bad cold, sinus infection and then a back injury but have started doing short rides again so look forward to giving my refurbished Brompton a much longer test ride soon.
I look forward to many more Brompton adventures….Where do I go next year?